Contact State
Creating a Support Ticket in MyGaDOE portal> SE Applicatio
The Contact State tab is a ticket system that allows LEAs to send tickets to the Special Education Data team regarding the LEA’s data or the applications. The tickets are monitored by the GO-IEP Data Team and the Part B Data Managers. Tickets are reviewed and resolved either by the GO-IEP Data Team or the Technology Team. LEAs are encouraged to use the ticket system to help resolve questions and issues with the applications.
When submitting tickets, provide details to assist GaDOE in processing the tickets. Include GTIDs if the request involves specific students.
If the application has multiple phases, identify the phase in question.
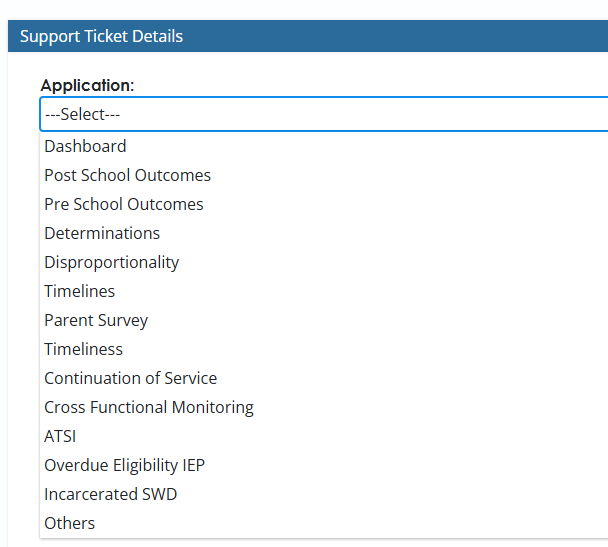
Note: The Contact State feature in the SE Applications Dashboard should also be used to notify GaDOE of concerns with Portal Applications not housed in the SE Applications Dashboard such as CCEIS and GLRS Tracker. Select "Other" if the application is not in the look-up list.
Screenshot of the Applications Available in the Ticket System
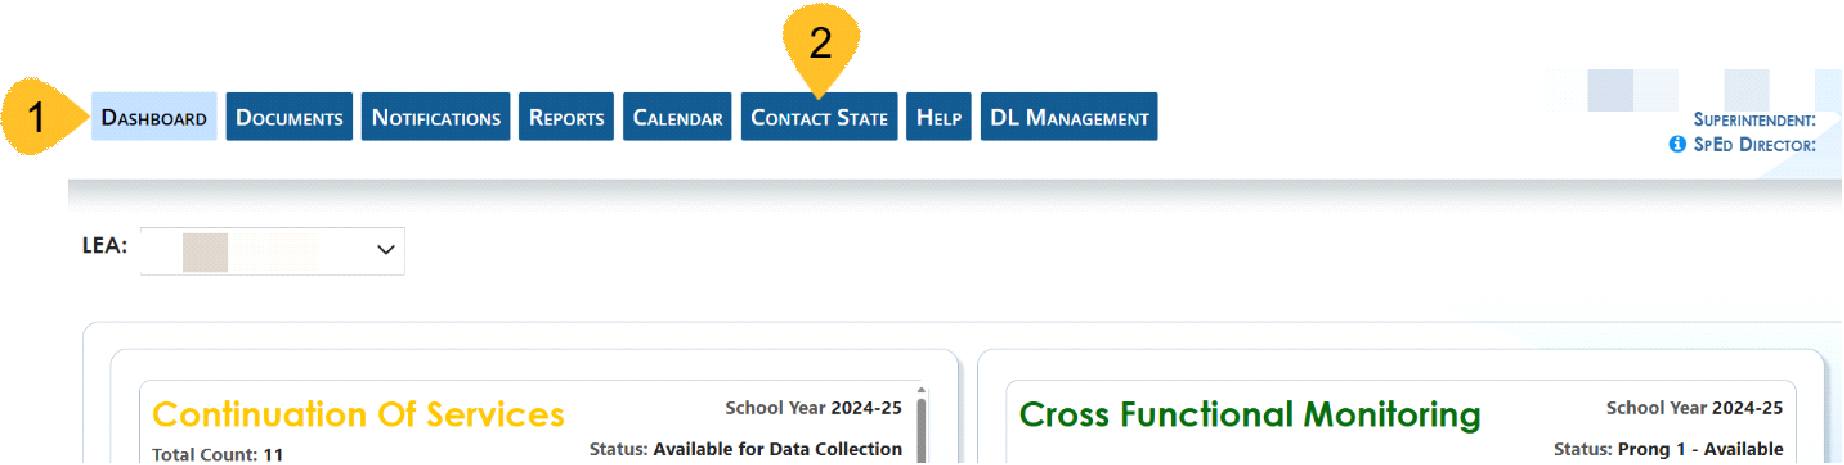
Steps for Creating Support Ticket
If the LEA has questions regarding the Overdue Eligibility and IEP process, please contact your District Liaison.
If the LEA has questions regarding data entry in the Overdue Eligibility and IEP application, please submit a ticket in the SE application using the Contact State tab. GaDOE staff will review the ticket and respond in the ticket application. To submit your ticket, scroll down and select advance to IT. Then monitor the application for a response.
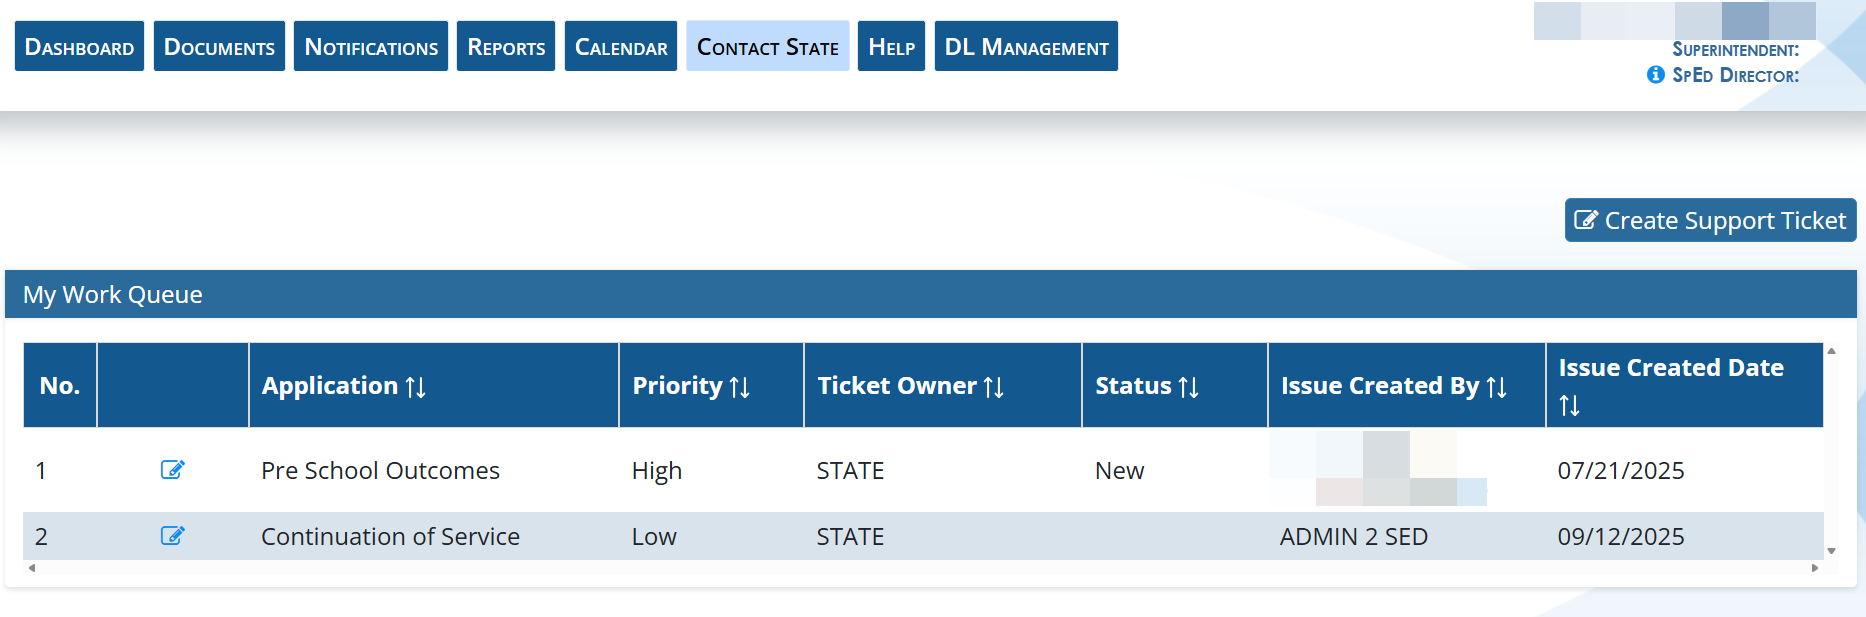
Screenshot of Creating a Support Ticket in SE Application Dashboard
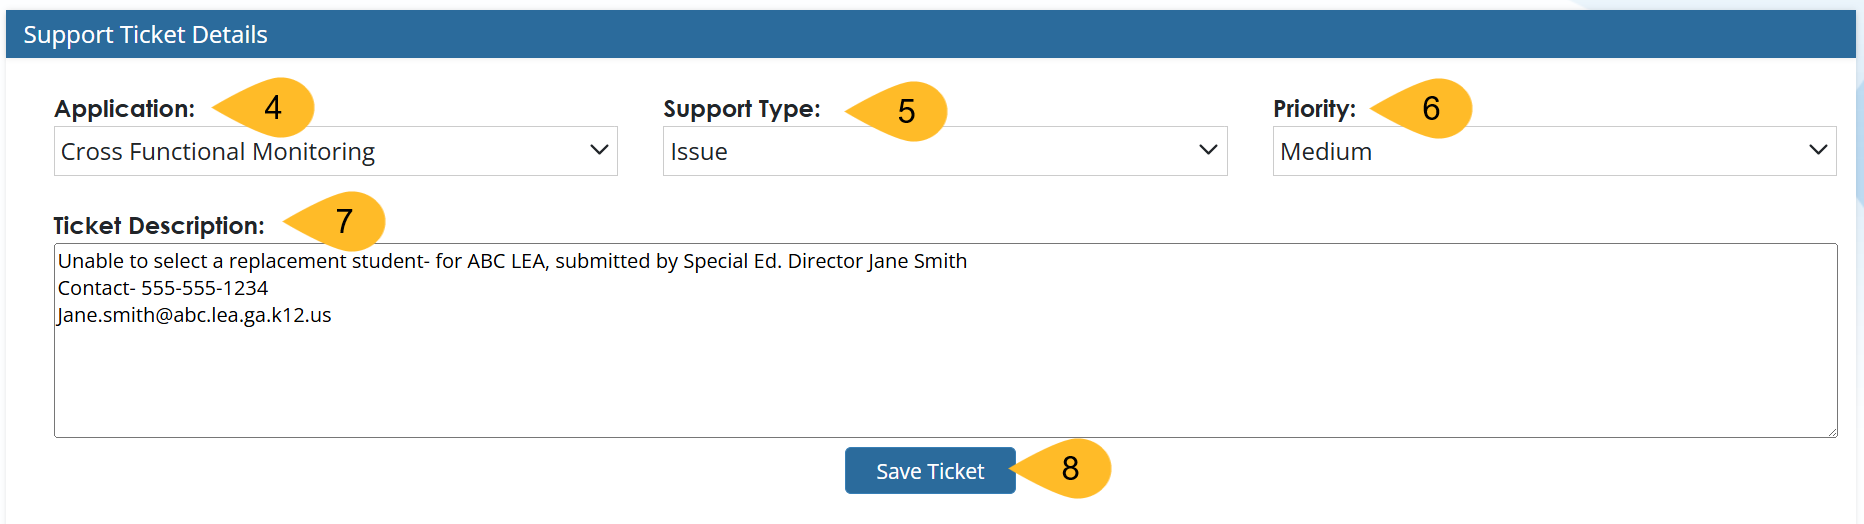
Steps for Creating a Help Ticket
- Log into SE Application Dashboard
- Select Contact State
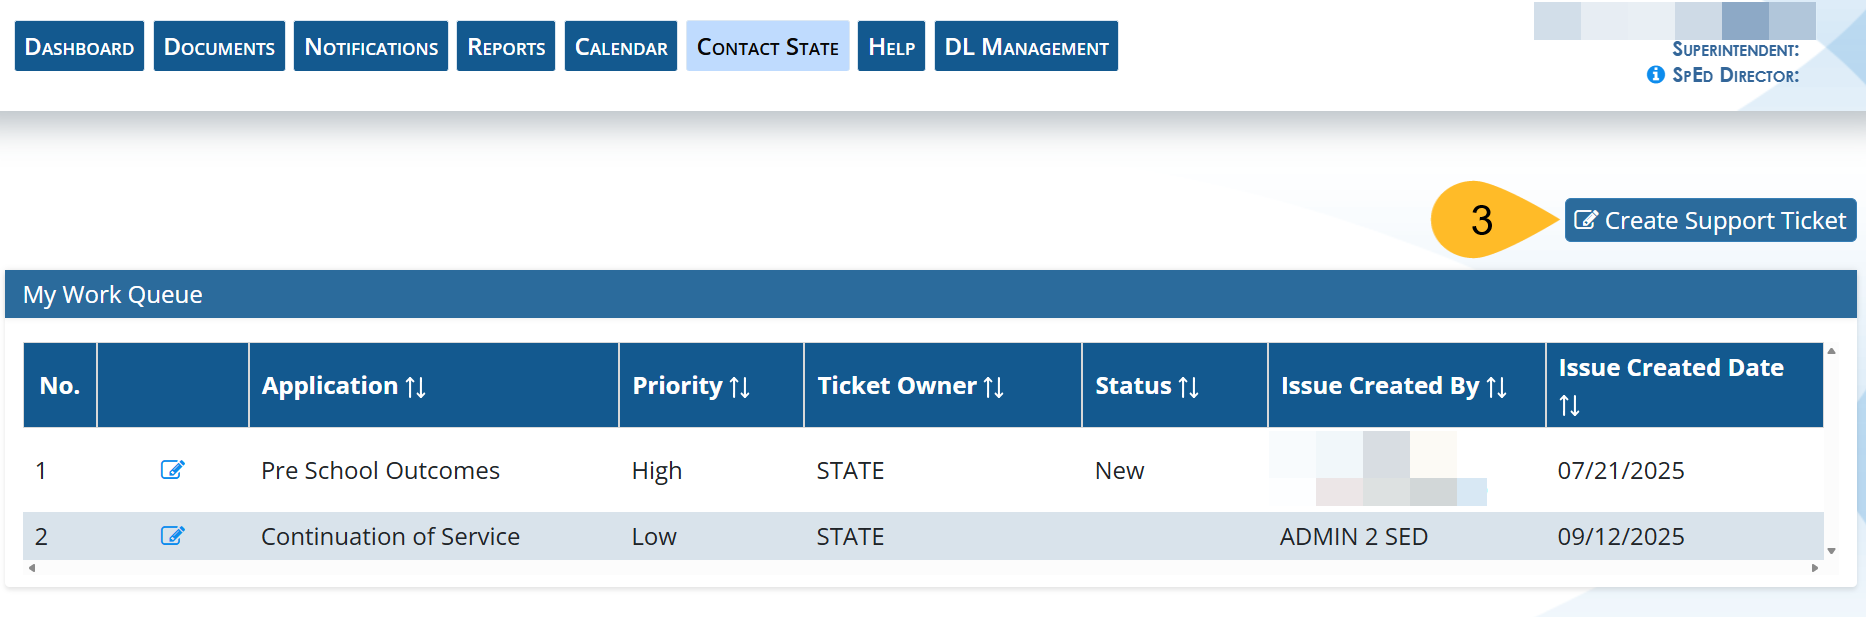
- Select Create Support Ticket
- Select the applicable application
- Select Support Type
- Application Help, Issue, Submitting Documents, Others
- Select Priority
- Low, Medium, High, Critical
- Write a description of the support needed. Please include LEA Name, person completing the ticket and contact information.
- Select Save Ticket
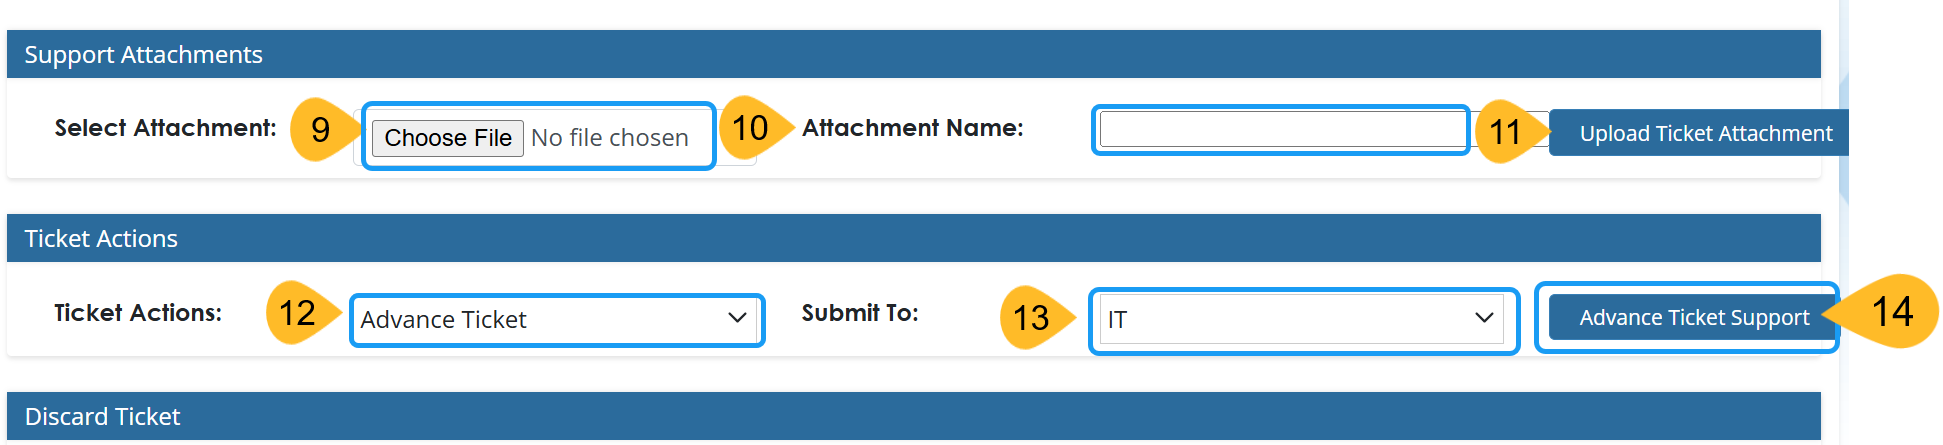
- Add any attachments such as screenshots or document that needs to be uploaded.
- Name the file
- Select Upload ticket attachment
- Select Ticket Action- Advance Ticket (If you do not select advance ticket to IT, we will not receive it. The ticket will stay in your “My Work Queue” folder.)
- Submit to IT
- Select Advance Ticket Support