System Calendar

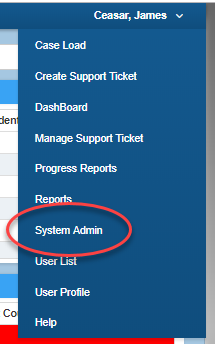
- Select “System Admin” from the drop-down menu at the top of the page.

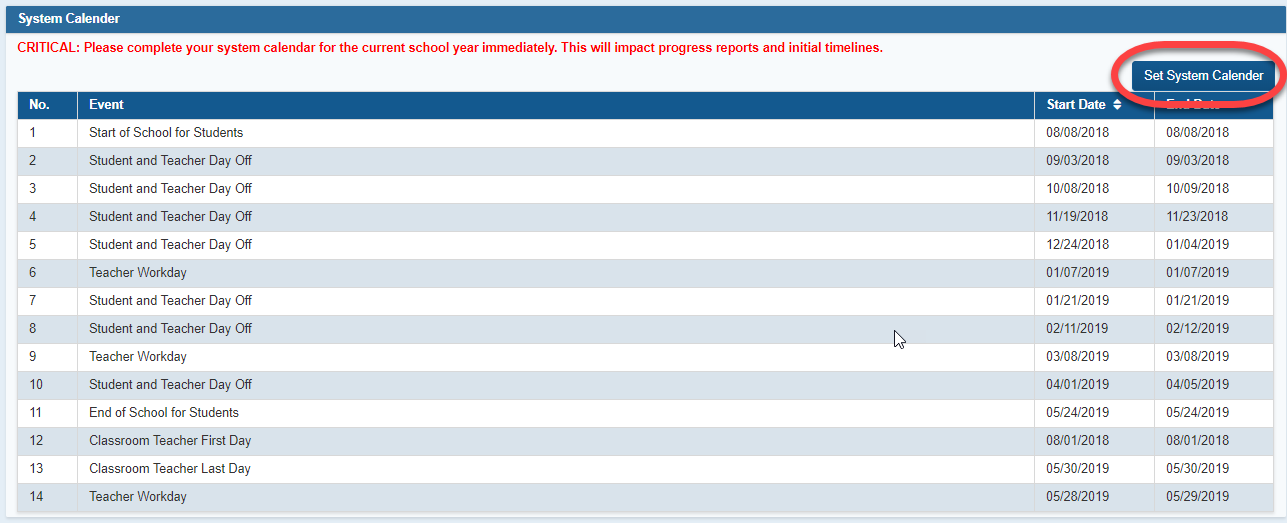
2. Select "System Defaults" from the list. To add or edit dates in the system calendar, select "Set System Calendar".

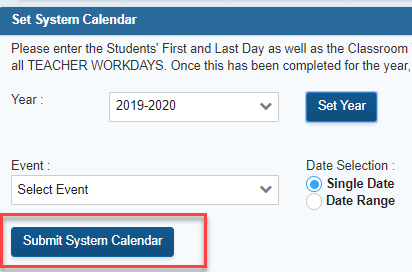
3. To add dates to the current school year, select the current school year from the drop-down list.
4. Add the date or dates for the current school year for students and teachers. Select “save” after entering each date. After all dates are entered select “Submit System Calendar”.
5. To set the calendar for the next school year once available, select the school year date range from the drop down list.
6. Select Set System Calendar to add dates for the upcoming school year.

7. Select each event and enter the date. The event could be a single date or a date range such as Christmas Break or Spring Break.

8. After the date for each event is entered, select “Save Date”.
9. Once all dates have been entered and saved, select “Submit System Calendar”.


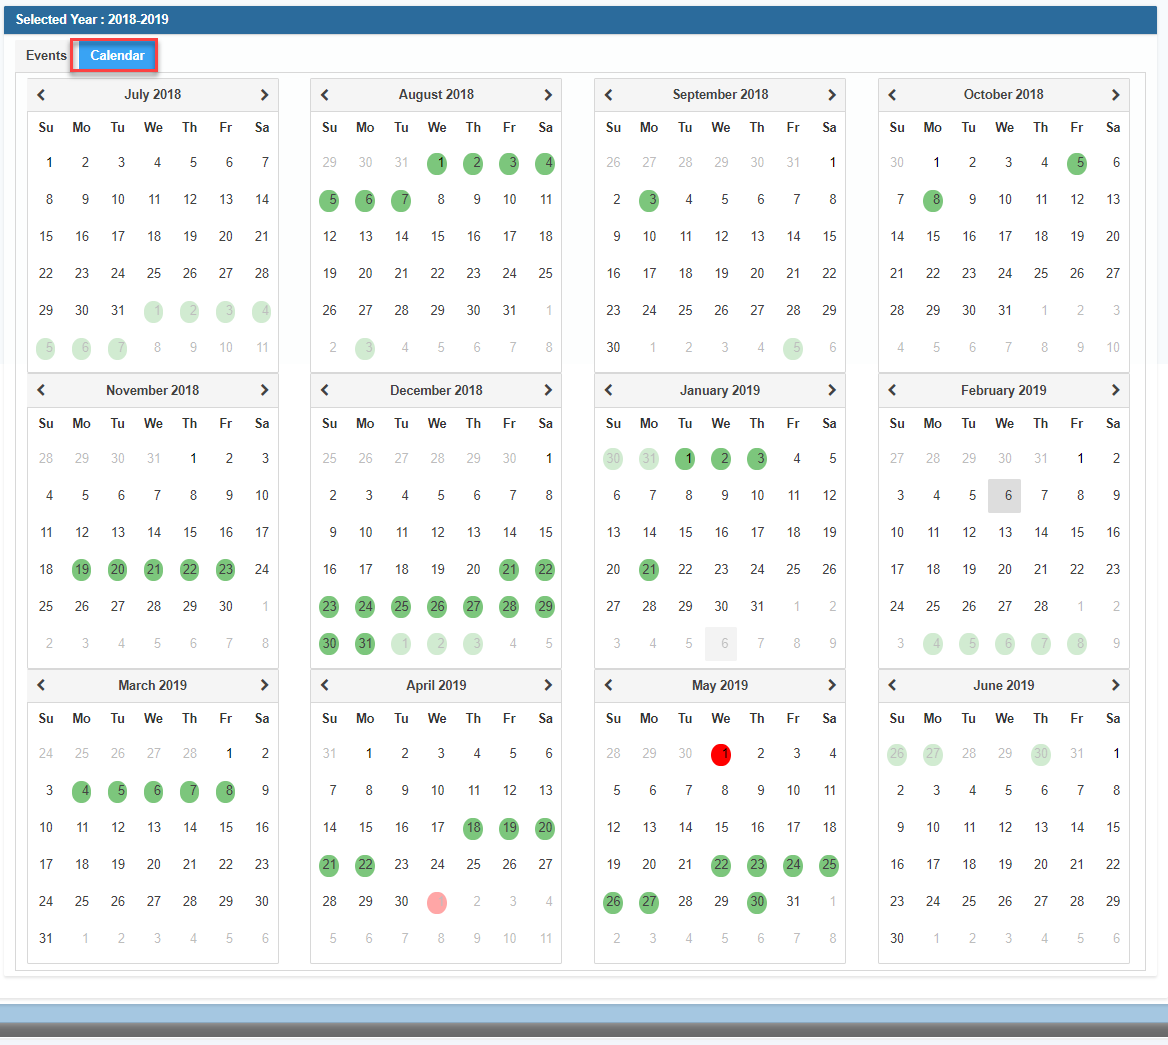
The calendar can be viewed either as a list of events or with events highlighted on the calendar view.

On the calendar view, you will see a red highlight on the 30th day before the last day of the school year for teachers. This identifies the end or STOP DATE of the period of time during which the summer days off will be counted as part of the 60 day timeline. Beginning on the day after this “red” day, if a Consent to Evaluate is received, the 60 day countdown will pause on the teacher last day and will restart on the teacher’s first day of the following year.
