Uploading documents

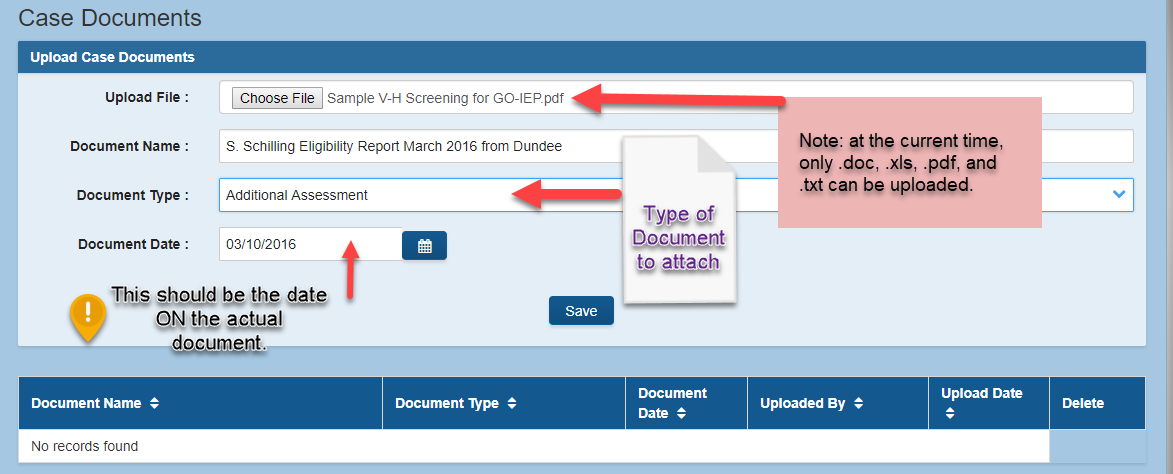
To upload a document that you have stored electronically, click "Choose File" and browse to the location where the document is stored on the computer or storage device. After selecting the file that you want to upload, the file name should appear in the Upload File area. Currently, only documents ending with .doc, .xls, .pdf, .docx and .xlsx and .txt can be uploaded into GO-IEP. Images -- .jpg and .bmp files -- will not be accepted by the upload link.
Best practice is to convert all documents to PDF before uploading.
Each document uploaded should have a specific name and date so that it can be easily identified.
(Ex. J. Thomas Eligibility Report March 2016)
Please do not upload documents with commas in the document name (Ex. J. Thomas Elig., Psych., and IEP). Documents with commas in the name cause errors when they are downloaded in certain browsers, such as Chrome. The documents will open in Internet Explorer. In addition, DO NOT upload documents that are password protected.
After entering all the required information in the upload area, click SAVE and the uploaded file will appear as a link in the documents section. The additional information about which user uploaded the document and when the document was uploaded will also show.

Uploading Documents on an exited student
On the Documents tab, you can upload documents for exited students. The date of the documents MUST be prior to the exit date.